You just drafted up a great blog post and don’t want to finish off your masterpiece with a generic stock photo you’ve seen 100 times. Standing out and separating yourself takes digital marketing mastery. This article will break down how to design your very own custom blog graphics for your featured image.
This tutorial uses Photoshop within the demonstration. However, there are many other great graphic editing software and free website tools to use online to design custom blog graphics.
Determining Dimensions for Graphic
The most common dimensions are 1200x600px and 1200x650px (which is a 16:9 aspect ratio) for featured blog images. These dimensions will produce the best display throughout your blog feed.
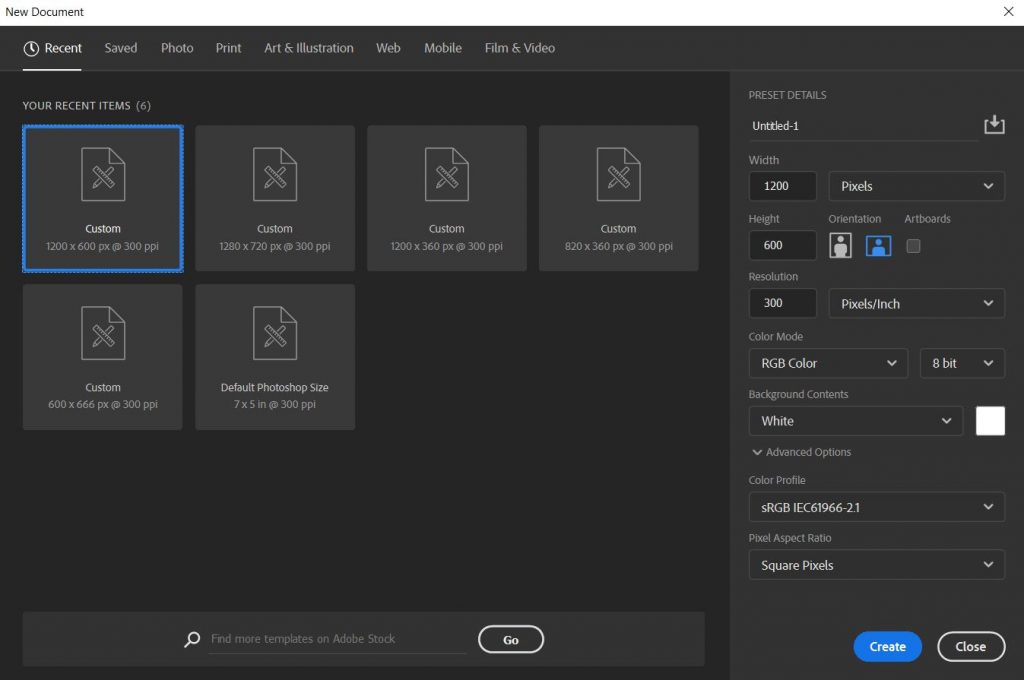
Your Blank Canvas
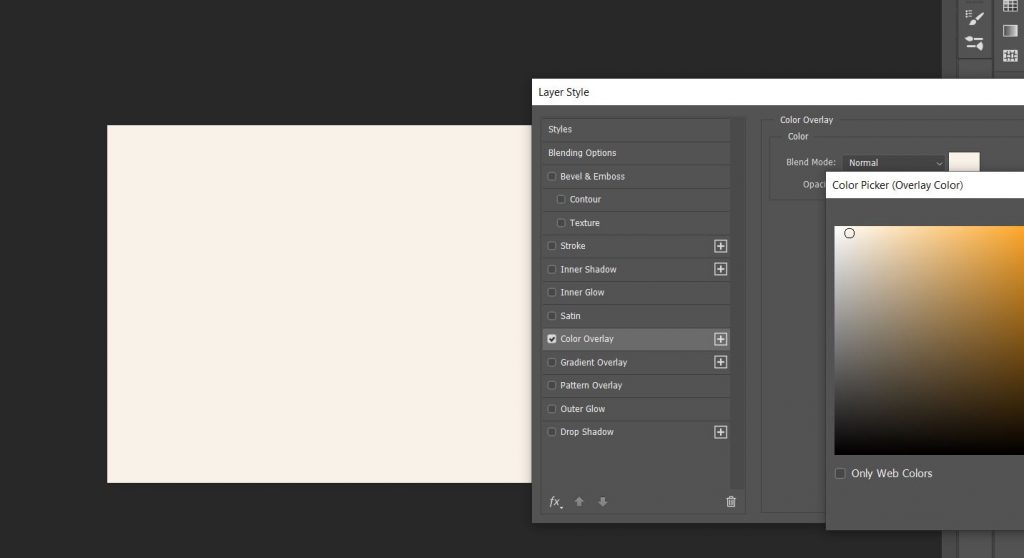
Begin with a light background color. A light grey or an off-white works well as a background for your canvas. Locate the color pallet in Photoshop (bottom left corner). Then, use the color overlay effect to change the color of the background.
Border, or No Border?
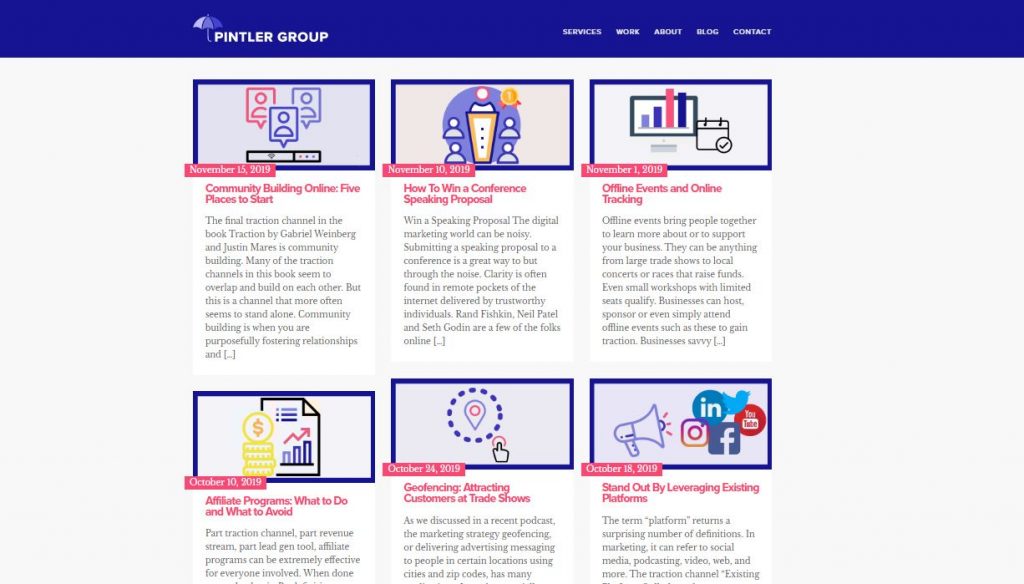
This is a great debate among designers and creative minds. I would argue, “don’t overthink it!” Borders are great to add a frame to your graphic. There are instances when borders do not fit the rest of the design, so leave it out. At the end of the day it’s all down to preference. The most important thing to keep in mind is to keep your featured blog images consistent. If the rest of your blog features images with borders, the natural thing to design next would include a border around your graphic.
Determining the Subject
Choosing the right graphic for your blog article can be tough. However, there are a multitude of free resources to use when selecting your ideal graphic to edit. Some of the more widely used free graphics websites are:
Once you have found your ideal image or graphic, simply drag and drop it into Photoshop (preferably a jpg or png file).
Color-It-Up Your Way!
Once your graphics are in place within your canvas, have fun overlaying custom colors that reflect your company or brand. This custom design features Pintler Group‘s primary and secondary colors.

Voila!
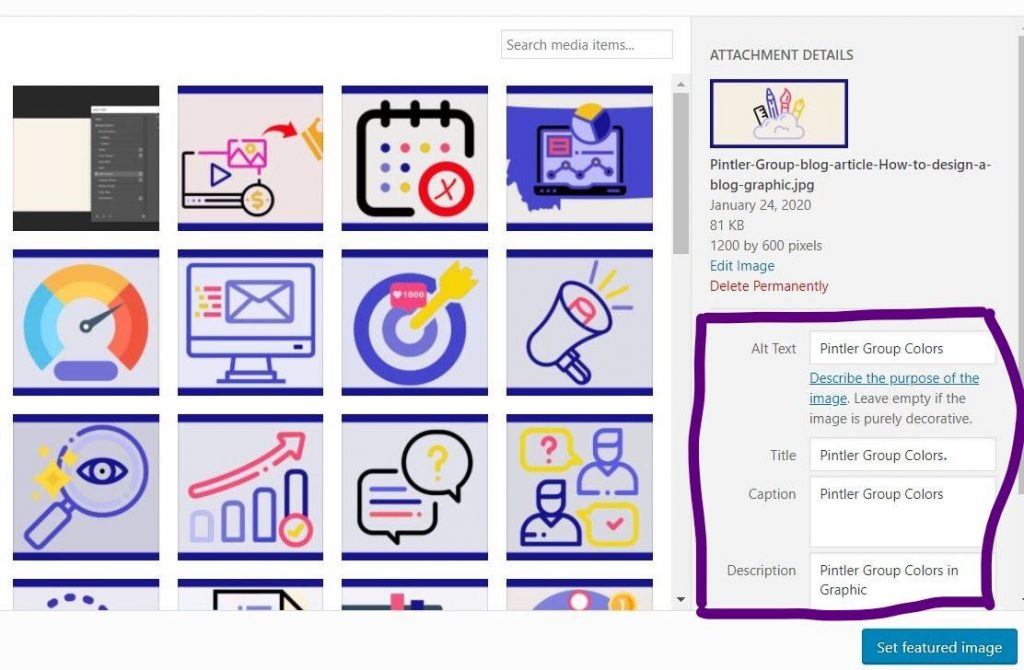
Upload your graphic for your blog post by going into your website’s settings and uploading it within your article (upload graphic in jpg file format). Here, I am using WordPress for this example.

Make sure to include descriptions within the alt text, title and description for your graphic. This helps with accessibility and readability for all readers.
Now it’s your turn to create your very own blog graphic featured image. Have some fun and let your creativity run free!

